Okay, real talk: a blown-out seam is not a crisis. I know it feels like one when you’re standing there holding your favorite jeans, or that throw pillow your dog decided to wrestle, and there’s a gaping hole where stitching used to be. But here’s the good news, fixing a seam by hand is one of the easiest sewing skills there is, and you honestly don’t need a machine, a sewing room, or any kind of special talent to do it. You just need a needle, some thread, and about ten minutes.
I fix seams by hand all the time. Sometimes it’s faster than dragging out the machine, sometimes the item’s too bulky to shove under a presser foot, and sometimes I just want to sit on the couch with Netflix on and mend something with my hands. Whatever your reason for being here, let’s get that seam closed back up.
What You’ll Need to Repair the Seam
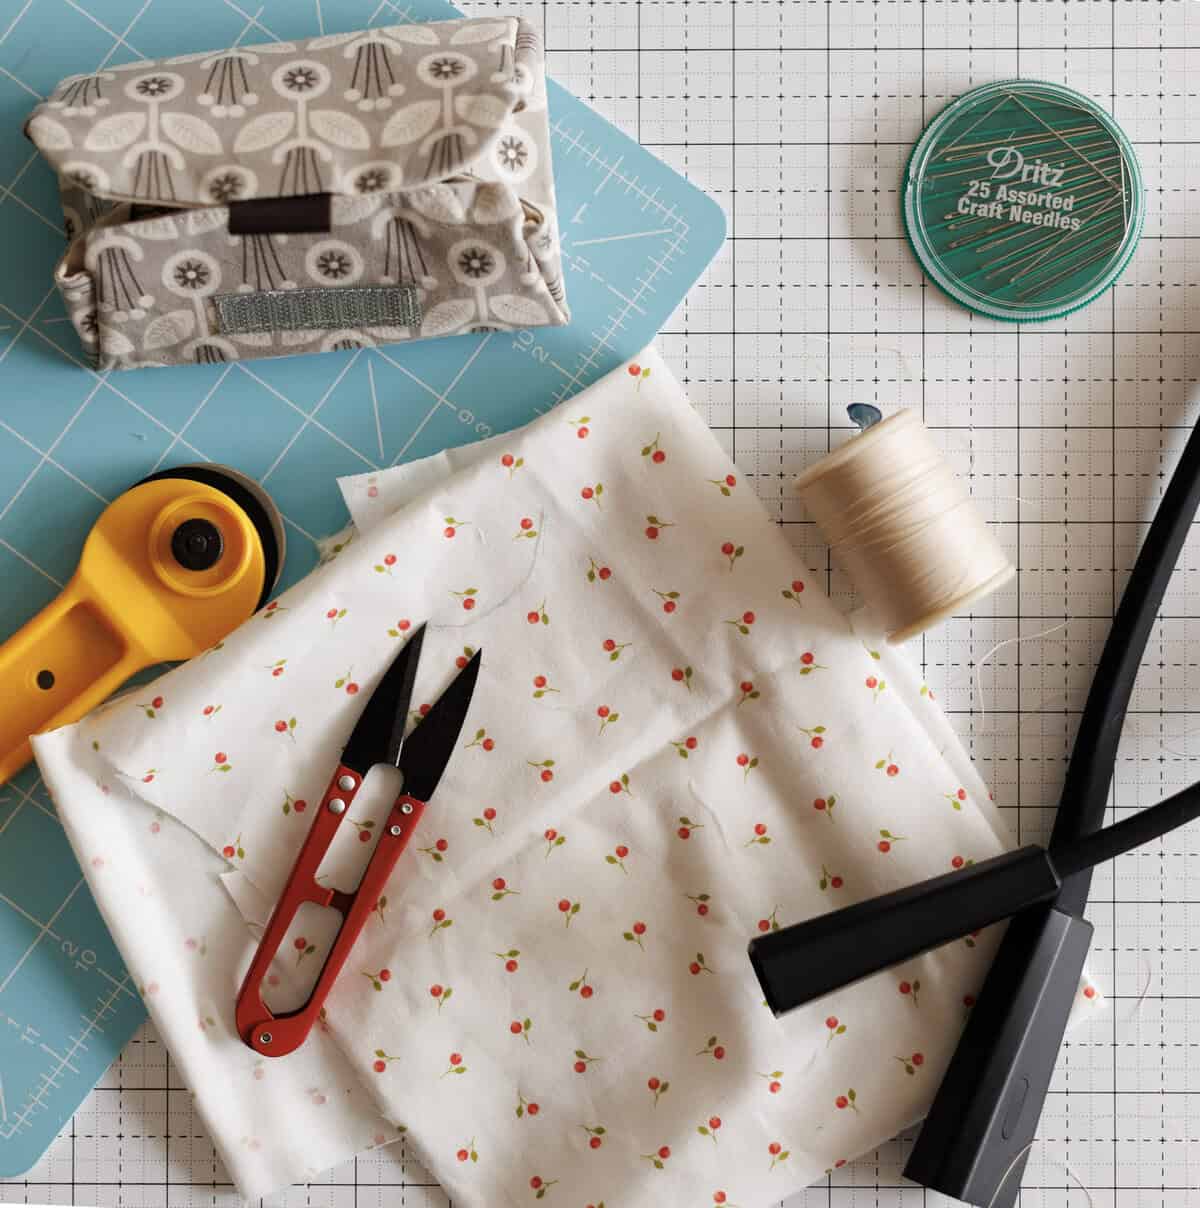
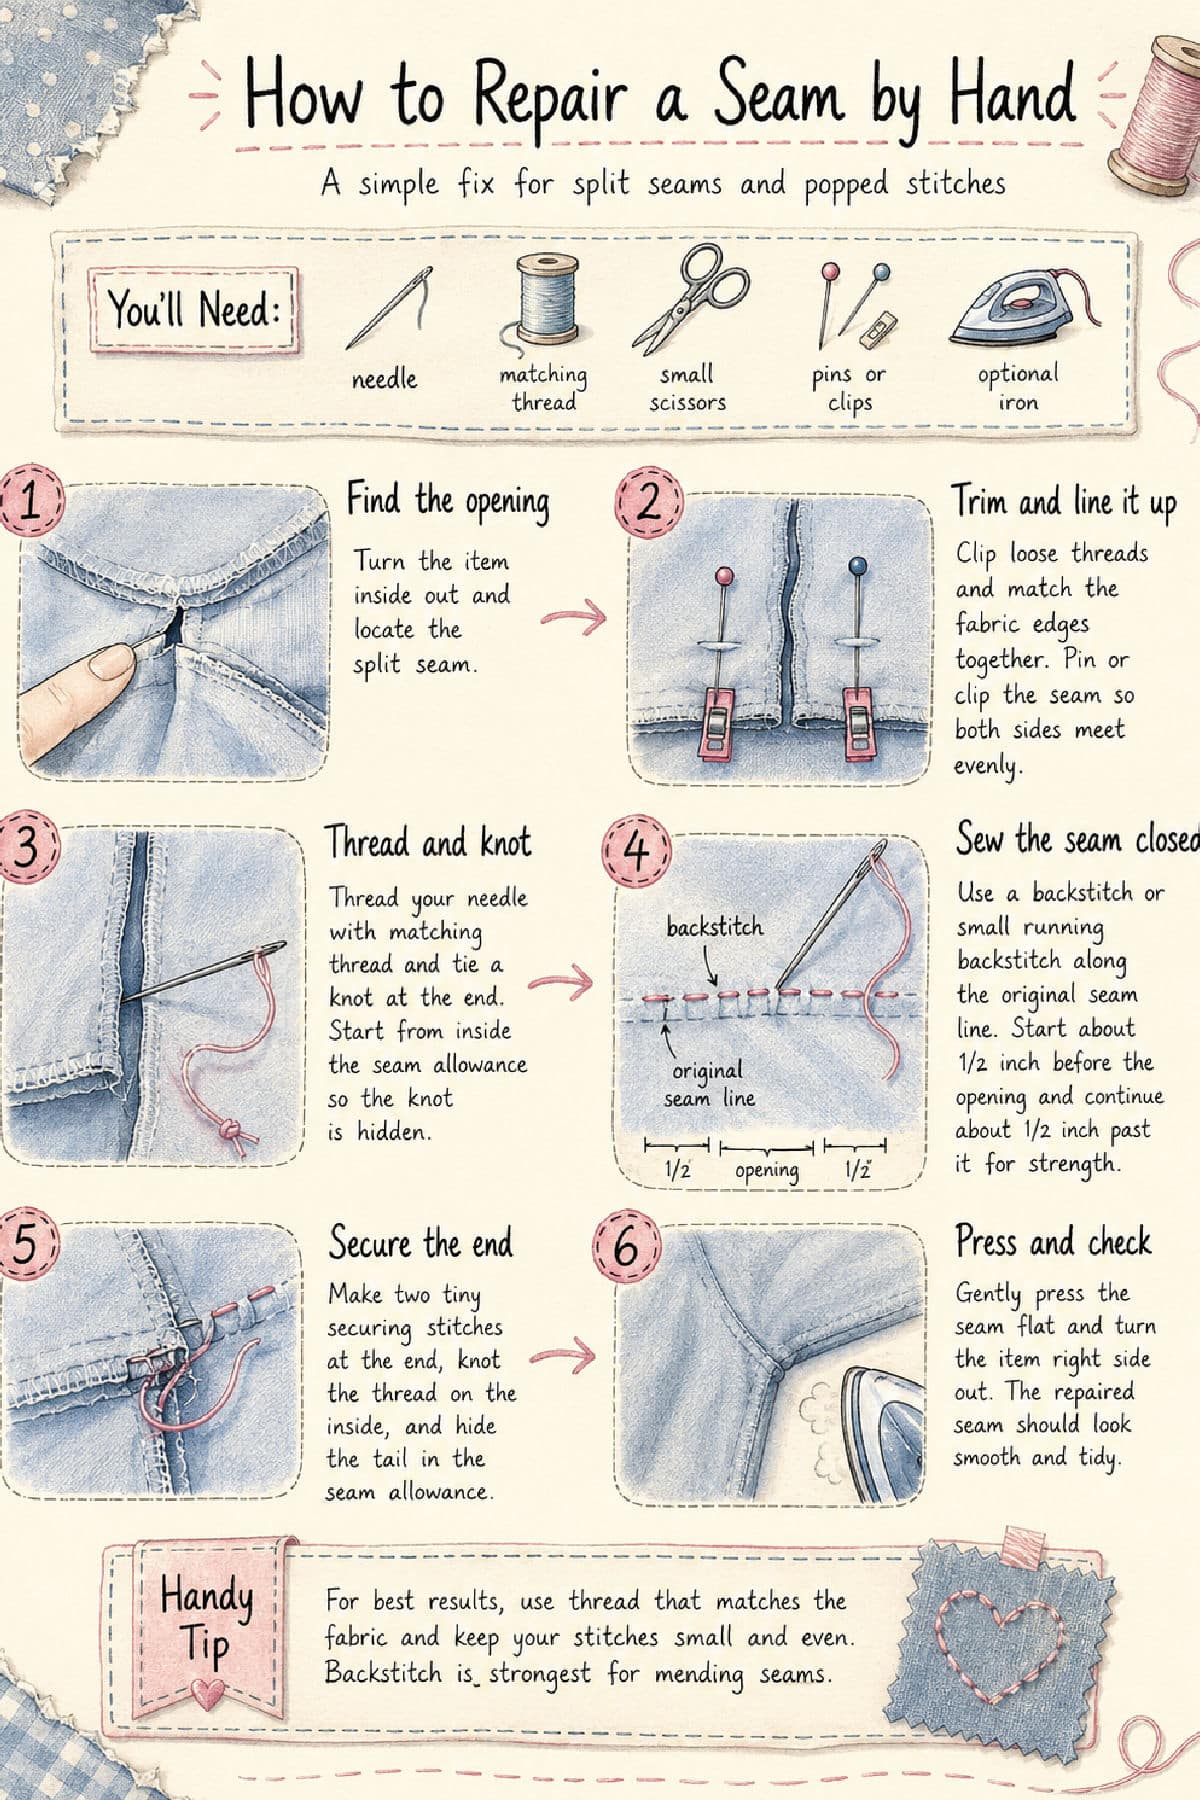
Nothing fancy, promise. Here’s your list:
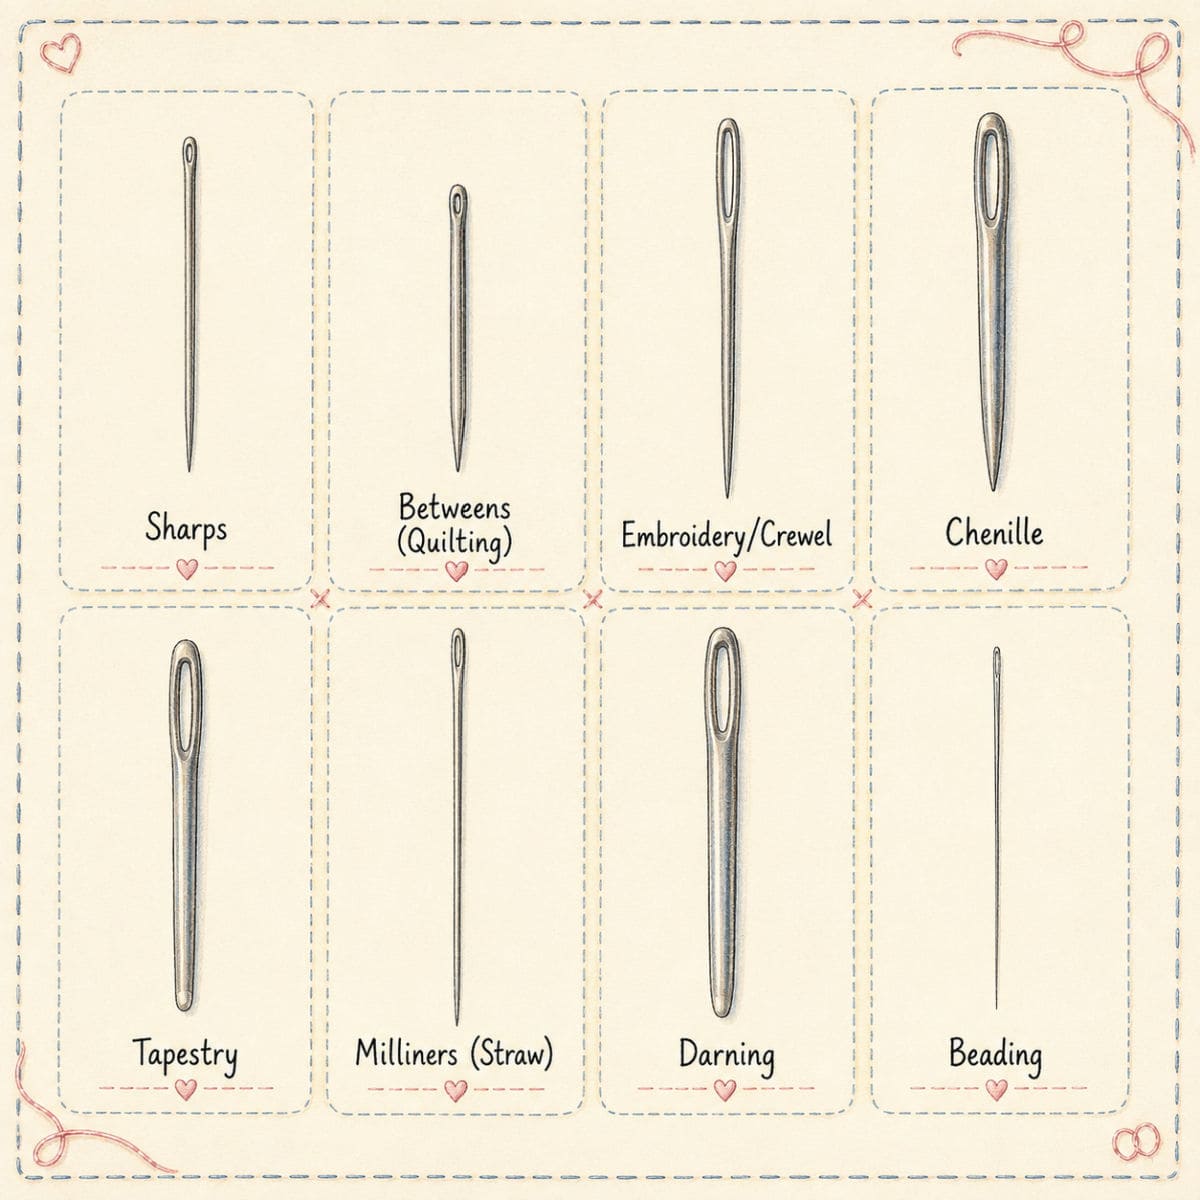
- A hand-sewing needle (a basic sharp needle works for most fabrics)
- Thread that matches your fabric color (or close enough, nobody’s grading you)
- Small sewing scissors or snips
- Straight pins (a few, just to hold things in place)
- The item that needs fixing, obviously
- Optional: a thimble, if you’re tender-fingered like me
That’s it. If you’ve got a little sewing kit in a drawer somewhere, you’re already set.
Lets get to it!
Step 1: Assess the Damage
Before you thread a single needle, take a good look at what you’re working with. Turn the item inside out (or right-side out, whatever lets you see the seam best) and figure out exactly where the stitching has come apart. Is it a clean little gap, or has the fabric started to fray at the edges too? This matters because it tells you how much seam allowance you’ve actually got to work with — you want to sew back into solid fabric, not just tack the frayed bits together and hope for the best.
Give the area a quick press with your fingers to flatten it out, and if there are any loose threads dangling from the original seam, trim them close so they’re not in your way.
Step 2: Thread Your Needle and Knot It
Cut a length of thread about arm’s length is good, maybe 18-24 inches. Any longer and you’ll spend the whole project fighting tangles, trust me. Thread it through your needle, then decide: single thread or doubled?
For most seam repairs, I double the thread. Just pull it through the needle so both ends meet, and tie a knot at the bottom. Doubling gives you extra strength, which is exactly what you want in a spot that already proved it could rip.
Step 3: Pin It Shut
Line up the two edges of the open seam so they sit the way they originally did theright sides together if that’s how the seam was sewn, matching up the fold lines. Pop a pin or two in to hold everything in place while you sew. This step feels like it’s optional, but skip it and you’ll end up with a pucker or a crooked line, and then you’re just doing this twice.
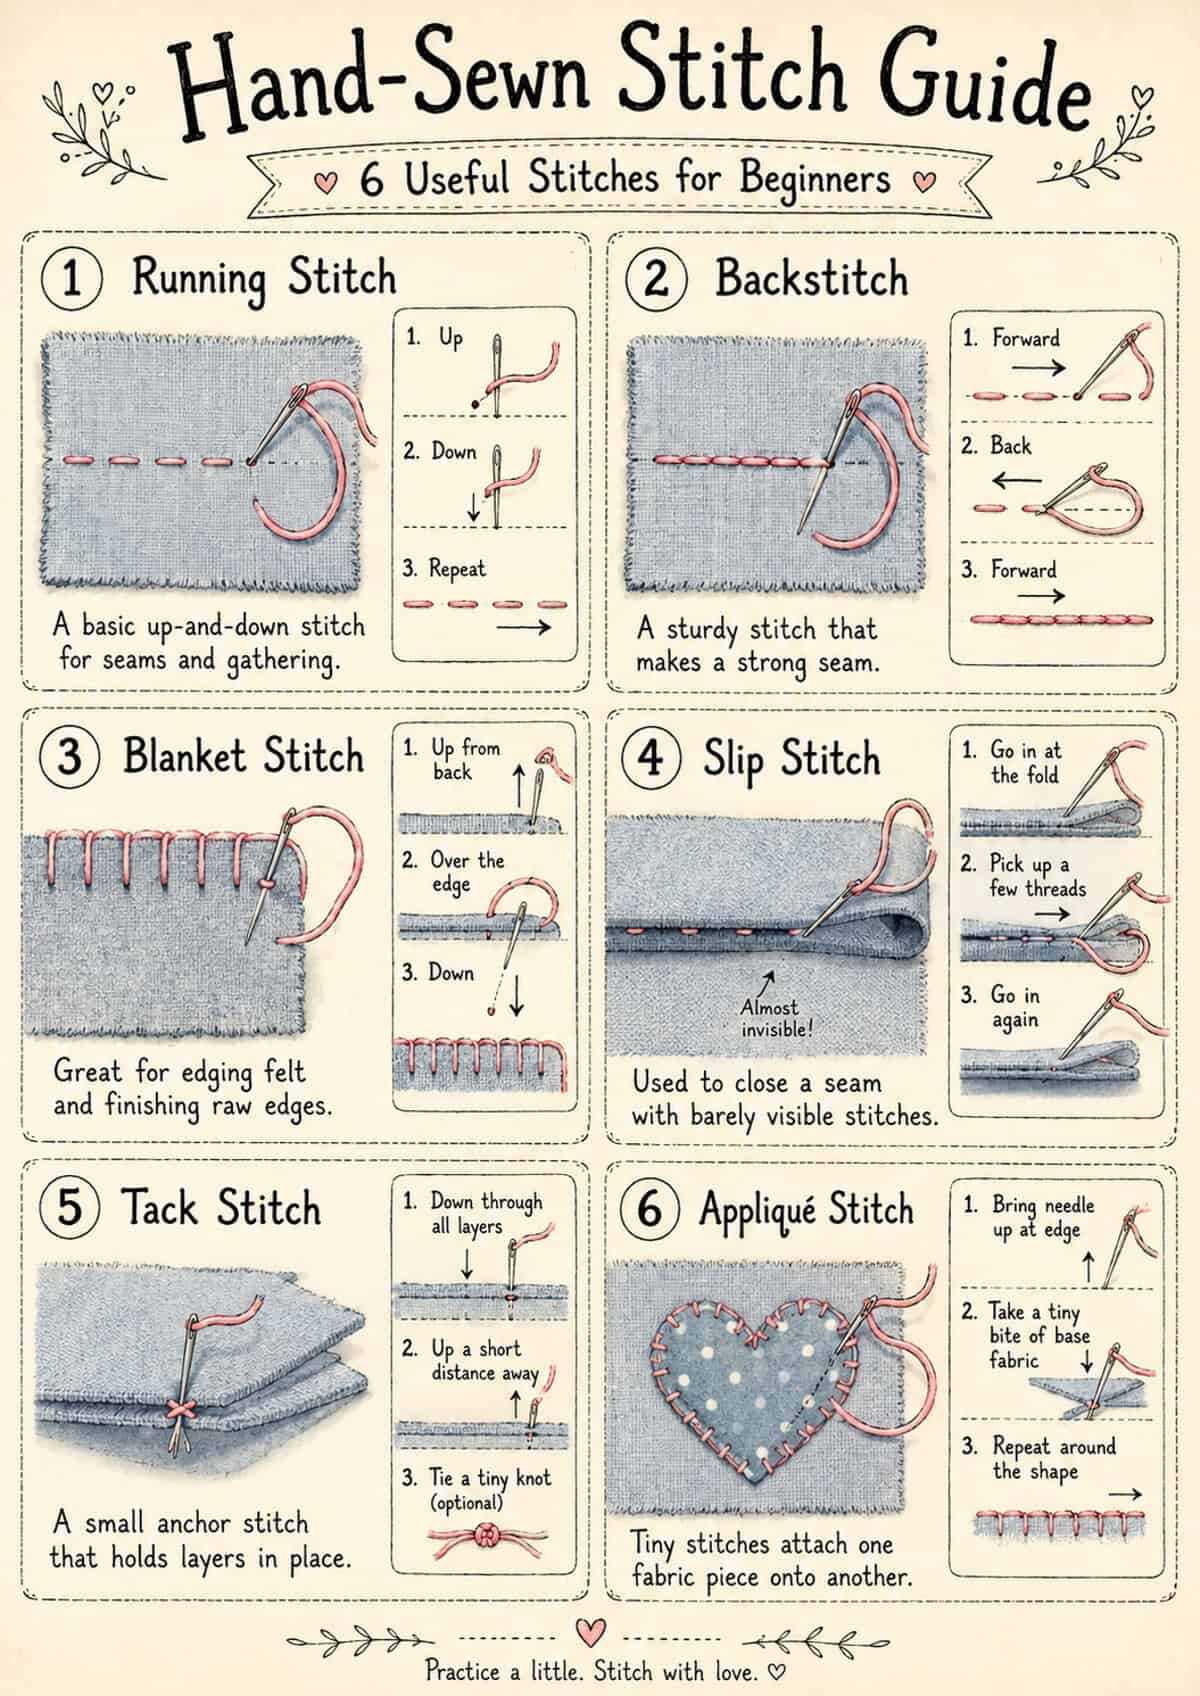
Step 4: Sew It Closed with a Backstitch
This is the heart of the whole repair, and the backstitch is your best friend here because it’s strong it mimics what a sewing machine does, locking each stitch in place so the seam won’t just pop open again next week.
Here’s how it goes:
- Starting a tiny bit before the gap (sew back into the solid, unbroken stitching by about a quarter inch), bring your needle up through the fabric.
- Take a small stitch backward, pushing the needle down through the point where the previous stitching ended.
- Bring the needle back up a stitch-length ahead of where you started.
- Now stitch backward again, into the same hole your first stitch came up from.
You’re basically going forward-back-forward-back the whole way down the gap, which creates a solid, continuous line on the front and a slightly overlapping line on the back. Keep your stitches small and even somewhere around 1/8 to 1/4 inch is perfect for most repairs. Continue past the end of the gap by another quarter inch or so, back into the original stitching, so your new repair blends right into what was already there.
Step 5: Knot Off and Trim
Once you’ve sewn past the gap into solid seam, take one more small stitch and, instead of pulling the thread all the way through, leave a little loop. Pass your needle through that loop and pull snug to create a knot right against the fabric. Do that once or twice for good measure, then snip the thread close.
Give the whole seam a gentle tug-test (not a yank, just a firm pull) to make sure it’s holding. Then flip it right-side out, give it a press if it needs one, and admire your handiwork.
Tips for a Seam That Actually Stays Fixed
- Match your thread weight to the fabric. A heavy-duty thread on delicate fabric can actually cause more tearing, while thread that’s too thin won’t hold up on denim or canvas. When in doubt, all-purpose polyester thread is a safe middle ground for almost anything.
- Don’t skip sewing past the gap. Starting and ending your repair a little into the original, intact stitching is what keeps the fix from just ripping open at the edges again. It’s tempting to sew exactly to the hole and stop, resist that urge.
- Iron as you go. A quick press before you start and after you finish makes a world of difference in how professional the repair looks. Wrinkled fabric is much harder to sew neatly.
- If the fabric itself is frayed or worn thin, add reinforcement. A small patch of fusible interfacing ironed onto the back of the fabric before you sew can give worn-out spots something sturdier to hold onto.
- Keep a “repair kit” on hand. A little tin or pouch with a needle, some neutral thread (black, white, and gray cover most things), and small scissors means you’re never caught without what you need when a seam decides to give out.
And that’s really all there is to it! A hand-sewn seam repair isn’t going to win any awards for speed, but it’s sturdy, it’s satisfying, and it means that shirt or pillow or bag gets a whole new life instead of heading to the trash. Once you’ve done it a time or two, it becomes one of those little skills you’re just quietly glad to have.