Hand sewing does not need to be complicated. If you know just a few basic hand sewing stitches, you can make all kinds of small fabric projects, repair a hem, sew on a patch, finish an edge, attach a button, or add a little decorative detail.
You don’t need to learn every stitch in the sewing universe. Honestly, that sounds exhausting and slightly suspicious. A small handful of useful stitches will take you a long way, especially if you enjoy slow stitching, small handmade projects, appliqué, felt ornaments, fabric pouches, needle books, or simple mending.
These are the hand sewing stitches I reach for most often:
- Running stitch
- Backstitch
- Blanket stitch
- Slip stitch
- Tack stitch
- Appliqué stitch
Once you understand what each stitch does, choosing the right one becomes much easier.
Before You Start
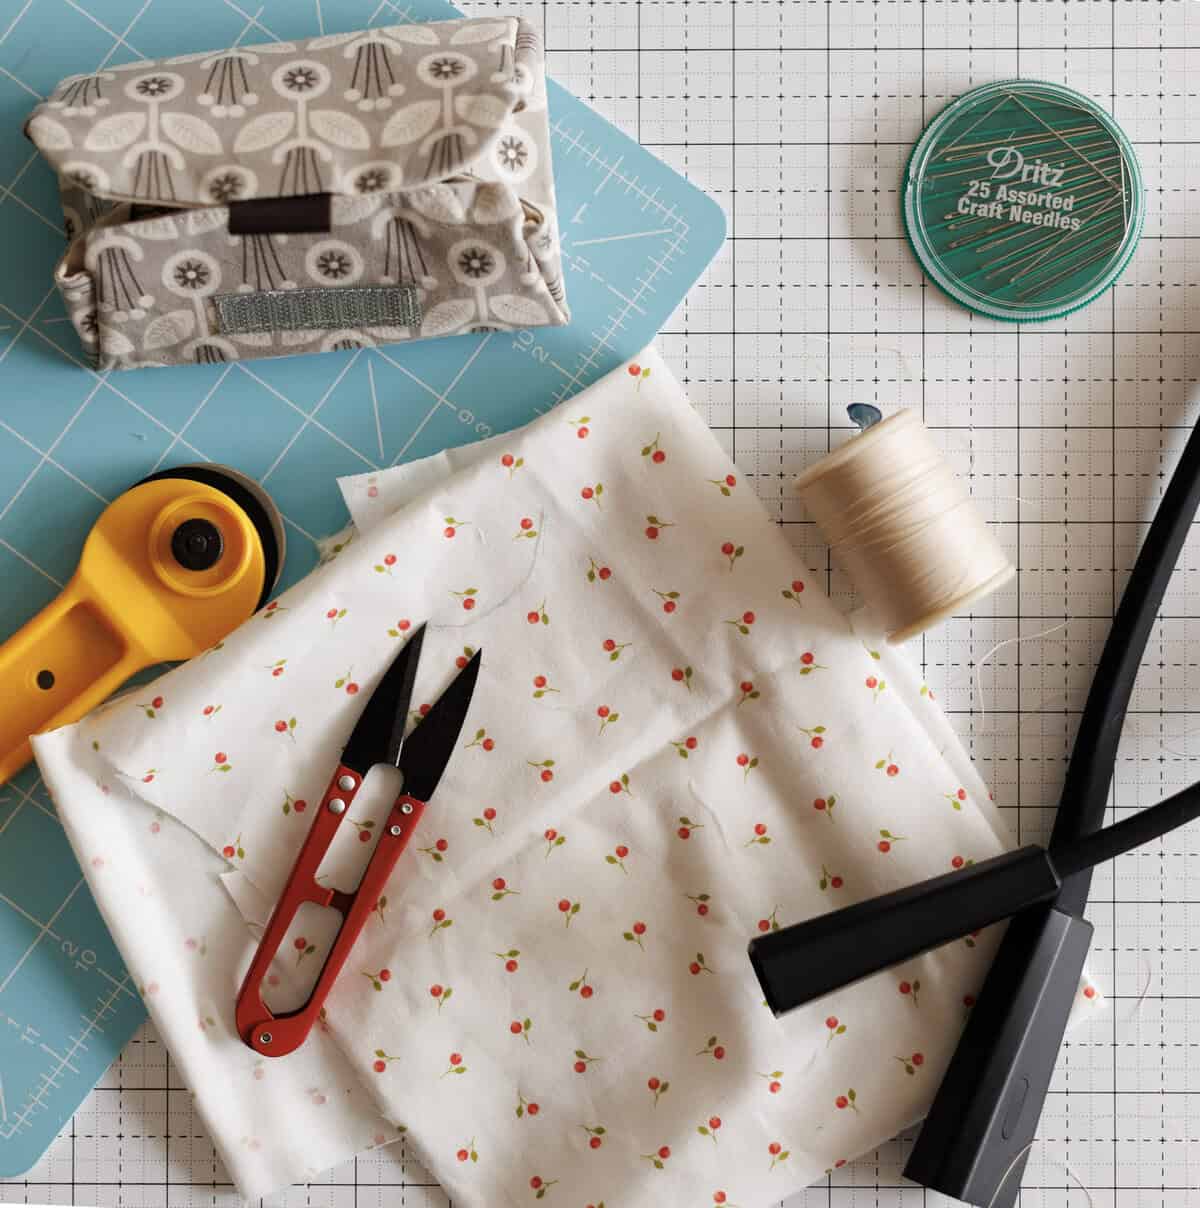
A few simple habits will make hand sewing more enjoyable.Also, think about putting together a simple hand sewing kit so you always have what you need, when you need it.
Use a comfortable length of thread, usually about 18 inches. Longer thread seems like it would save time, but it often twists, tangles, and forms mysterious knots that test your character.
Tie a small knot at the end of your thread unless your project needs a hidden start. Keep your stitches fairly even, but don’t worry about perfection. Hand stitching has a little personality, and that’s part of the charm.
If your fabric is slippery or your pieces shift around, use a few pins or small sewing clips to hold everything in place. Good lighting helps too, especially if you are sewing in the evening or stitching on the sofa.
Running Stitch
The running stitch is one of the easiest and most useful hand sewing stitches. It is made by weaving the needle in and out of the fabric in a straight line.
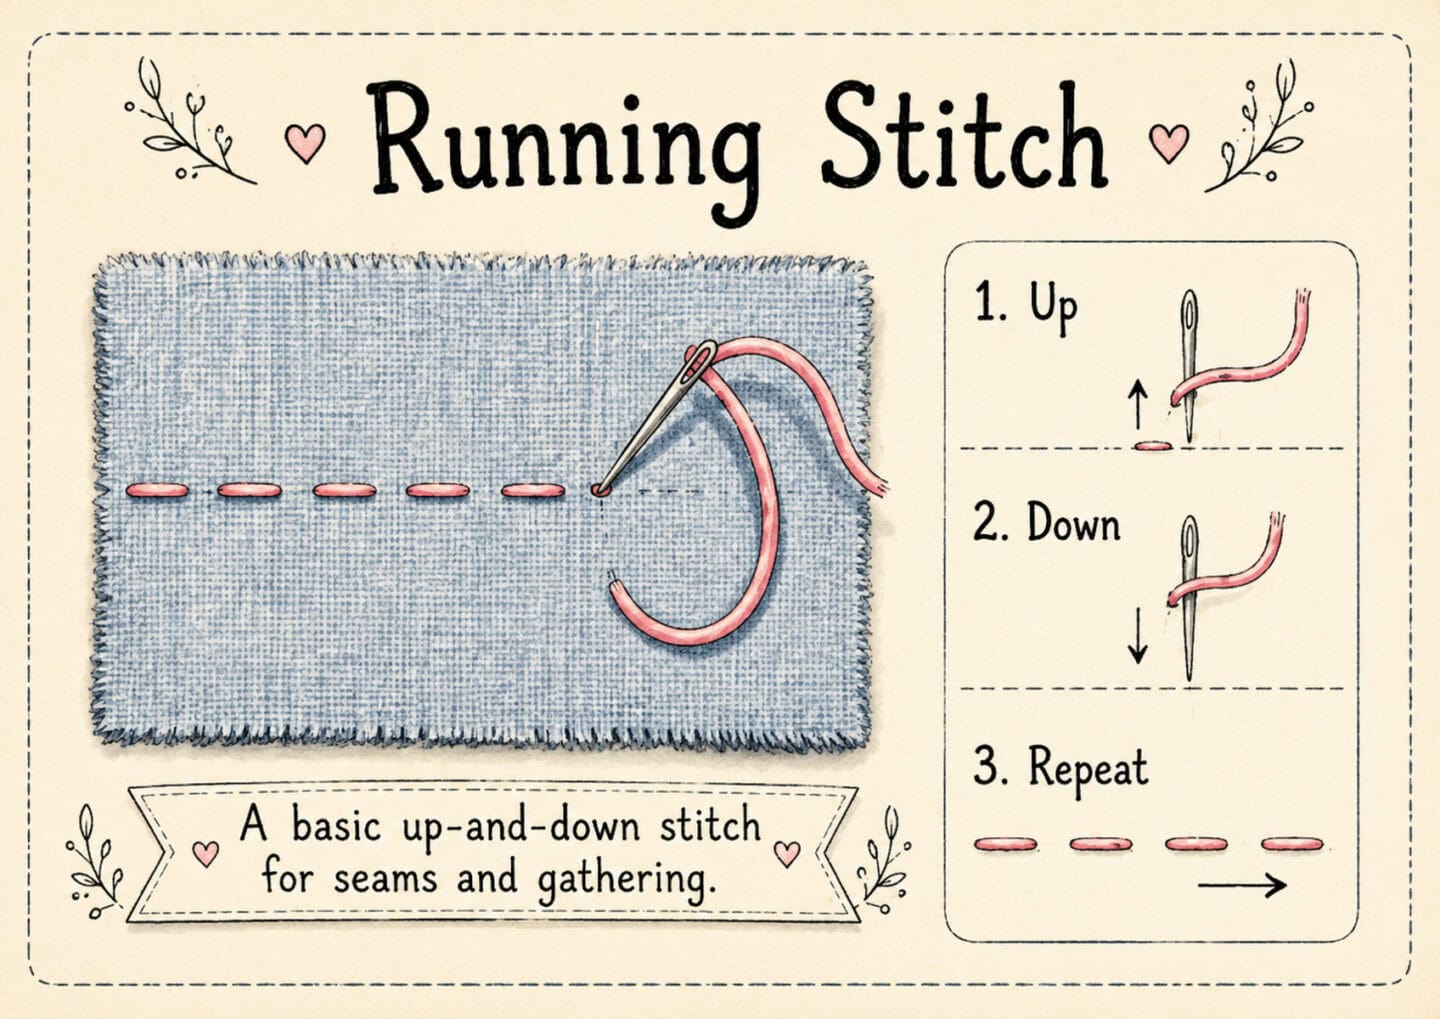
This is the stitch many of us learned first, even if we didn’t know it had a name. It’s simple, quick, and perfect for gathering fabric, basting pieces together, adding soft decorative lines, or sewing seams that do not need a lot of strength.
To make a running stitch, bring your needle up through the fabric from the back. Push it down a short distance away, then bring it back up again the same distance from the last stitch. Continue stitching in and out of the fabric, keeping the stitches as even as you can.
You can make the stitches small and neat, or a little longer for a more rustic handmade look. For decorative stitching, a slightly longer running stitch can look lovely, especially with contrasting thread.
Use the running stitch for:
- Basting fabric pieces together
- Gathering fabric
- Simple decorative stitching
- Light seams on small projects
- Slow stitching and visible mending
The running stitch is not the strongest stitch, so I would not use it alone for seams that will get a lot of pulling or wear. For those, the backstitch is a better choice.
Backstitch
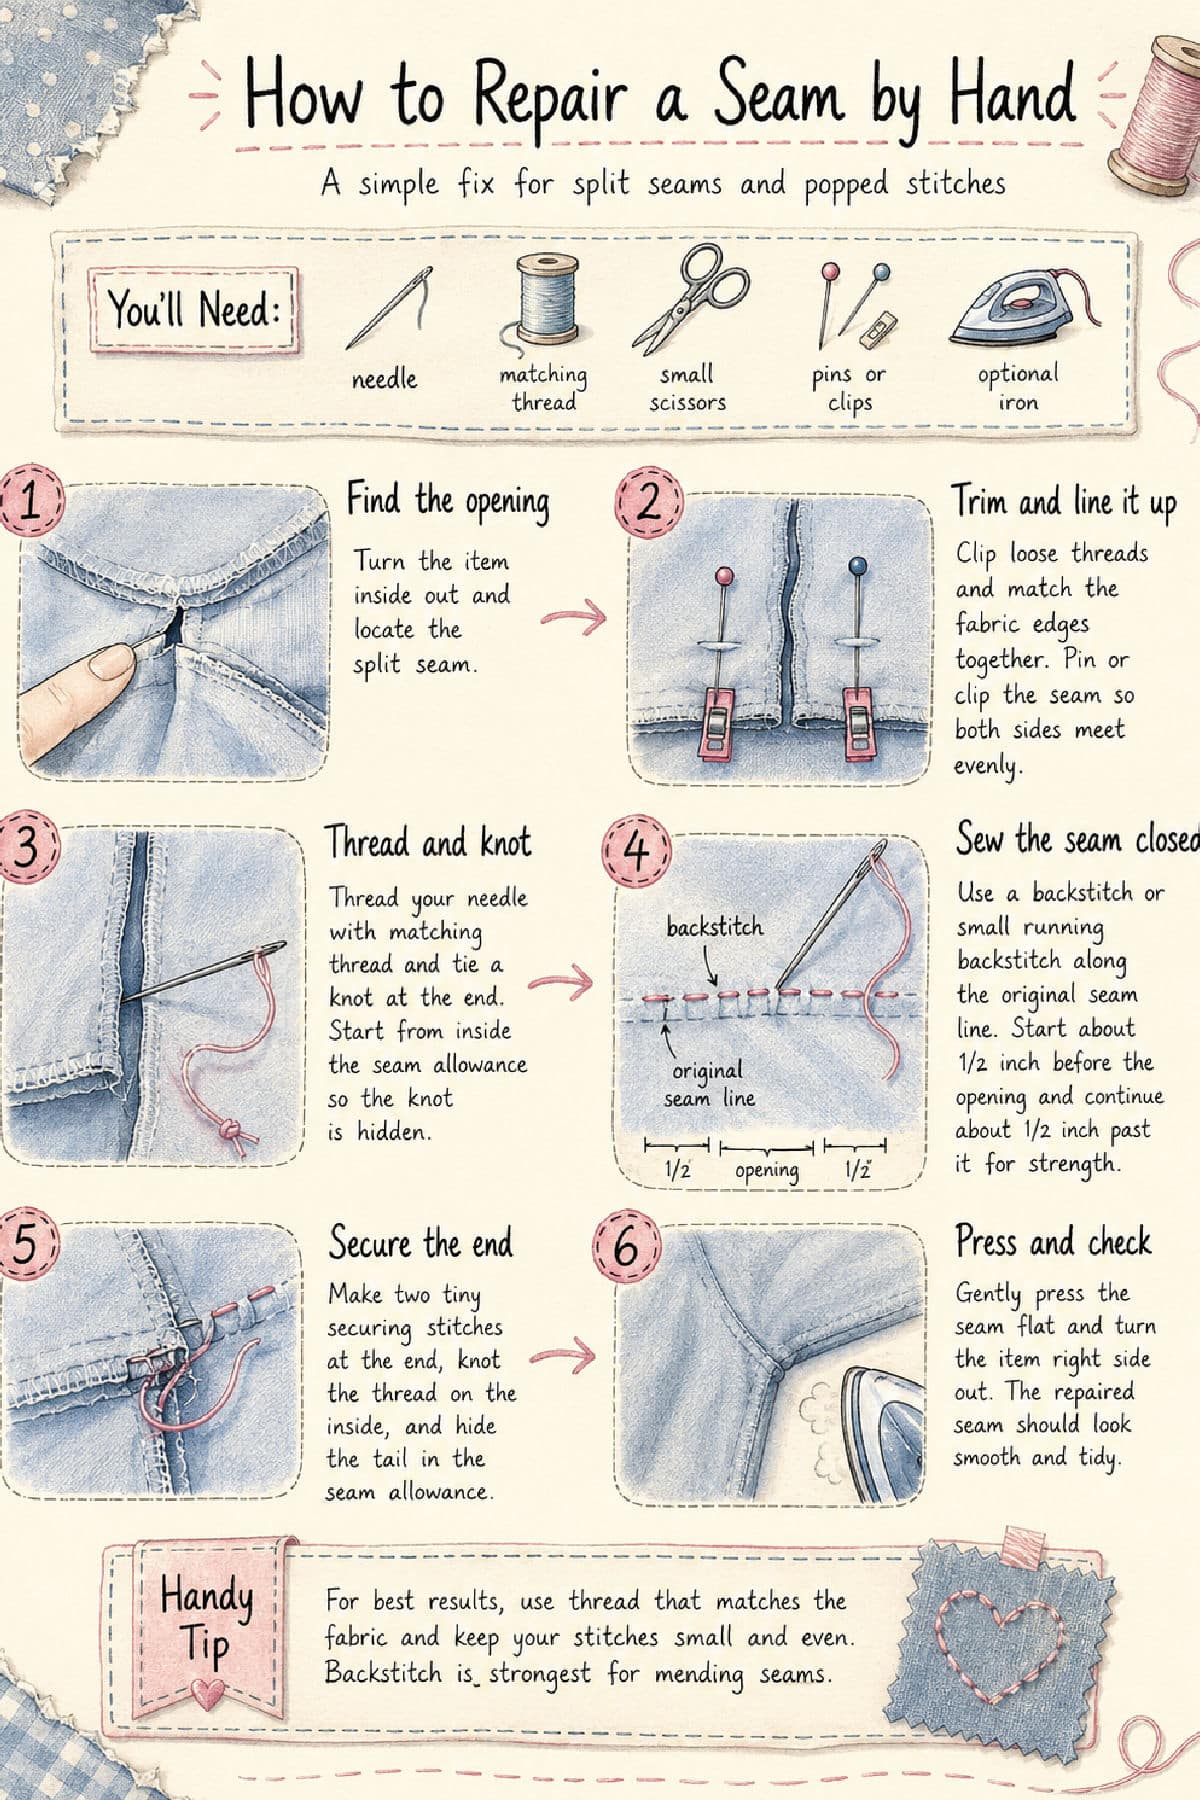
The backstitch is a strong hand sewing stitch and one of the best stitches for sewing seams by hand. If you are making small fabric projects and want a seam that holds well, this is the stitch to learn.
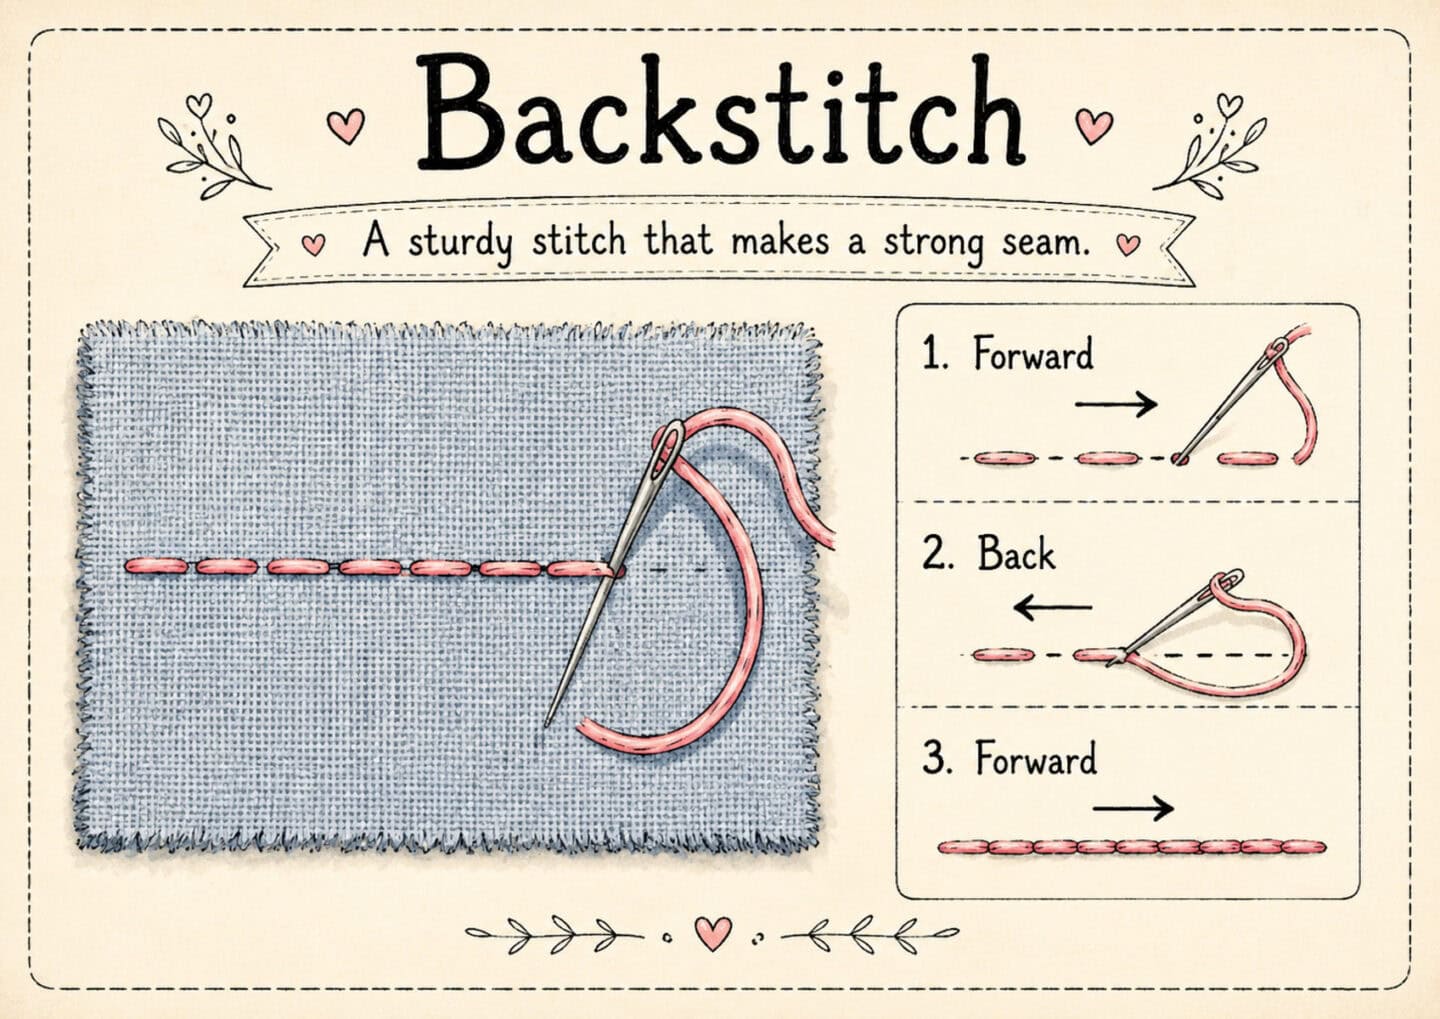
It gets its name because each stitch goes backward before moving forward. That little backward motion creates a strong, nearly continuous line of stitching.
To make a backstitch, bring your needle up through the fabric. Move forward a short distance and push the needle down. Then bring the needle back up another short distance ahead of that stitch. Now take the needle backward and insert it into the end of the previous stitch. Continue this pattern, moving forward and then stitching back.
The finished line looks almost like machine stitching from the front. On the back, it may look a little more layered, and that is perfectly fine.
Use the backstitch for:
- Hand-sewn seams
- Small pouches
- Stuffed ornaments
- Felt projects
- Repairs and mending
- Any place you need a stronger stitch
The backstitch takes a little more time than the running stitch, but it is worth it when you want strength. It’s one of those basic stitches that quietly does the hard work.
Blanket Stitch
The blanket stitch is both useful and pretty. It wraps around the edge of the fabric, which makes it a good choice for finishing raw edges, sewing felt pieces together, or adding a decorative border.
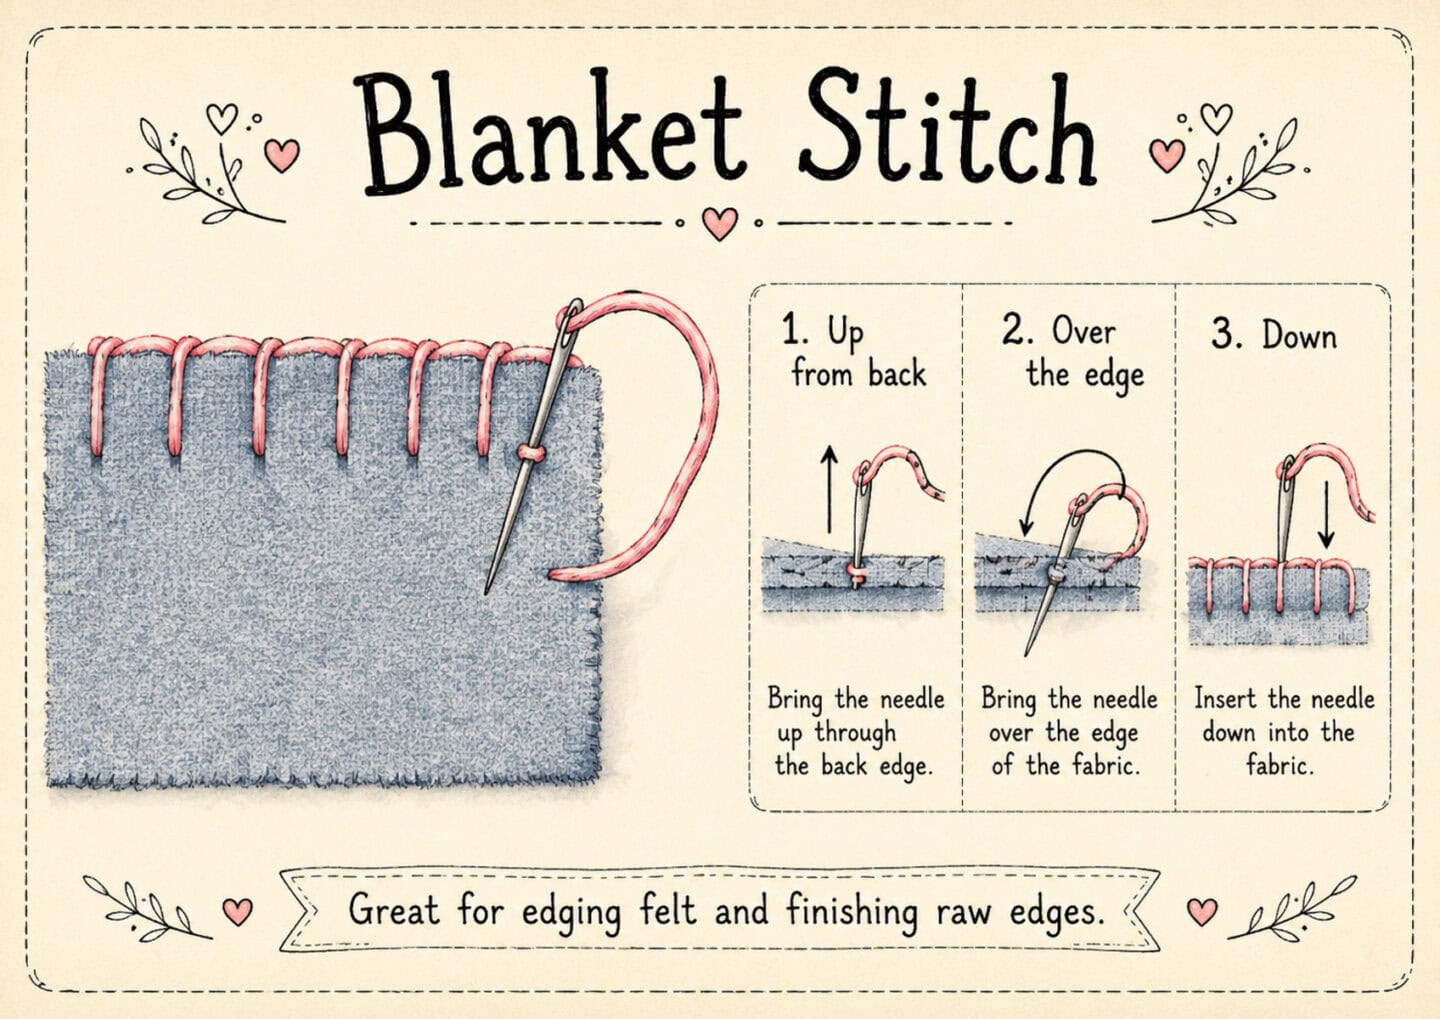
You’ll often see blanket stitch around felt ornaments, appliqué shapes, handmade decorations, and wool projects. It gives the edge a finished look without needing a sewing machine.
To make a blanket stitch, bring your needle up from the back of the fabric near the edge. Insert the needle a short distance away, catching both layers if you are sewing two pieces together. Before pulling the thread tight, bring the needle through the loop of thread. Gently pull the thread so the loop sits along the edge of the fabric.
Continue along the edge, keeping the stitches evenly spaced and the loops sitting neatly on the outside edge.
Use the blanket stitch for:
- Finishing felt edges
- Sewing two felt pieces together
- Decorative borders
- Wool appliqué
- Ornaments
- Coasters and small fabric pieces
The blanket stitch is very forgiving once you get the rhythm. If the first few stitches look a little wobbly, keep going. It usually evens out as your hands get used to the motion.
Slip Stitch
The slip stitch is a nearly invisible hand sewing stitch. It is used when you want to close an opening or sew two folded edges together without obvious stitches showing on the outside.
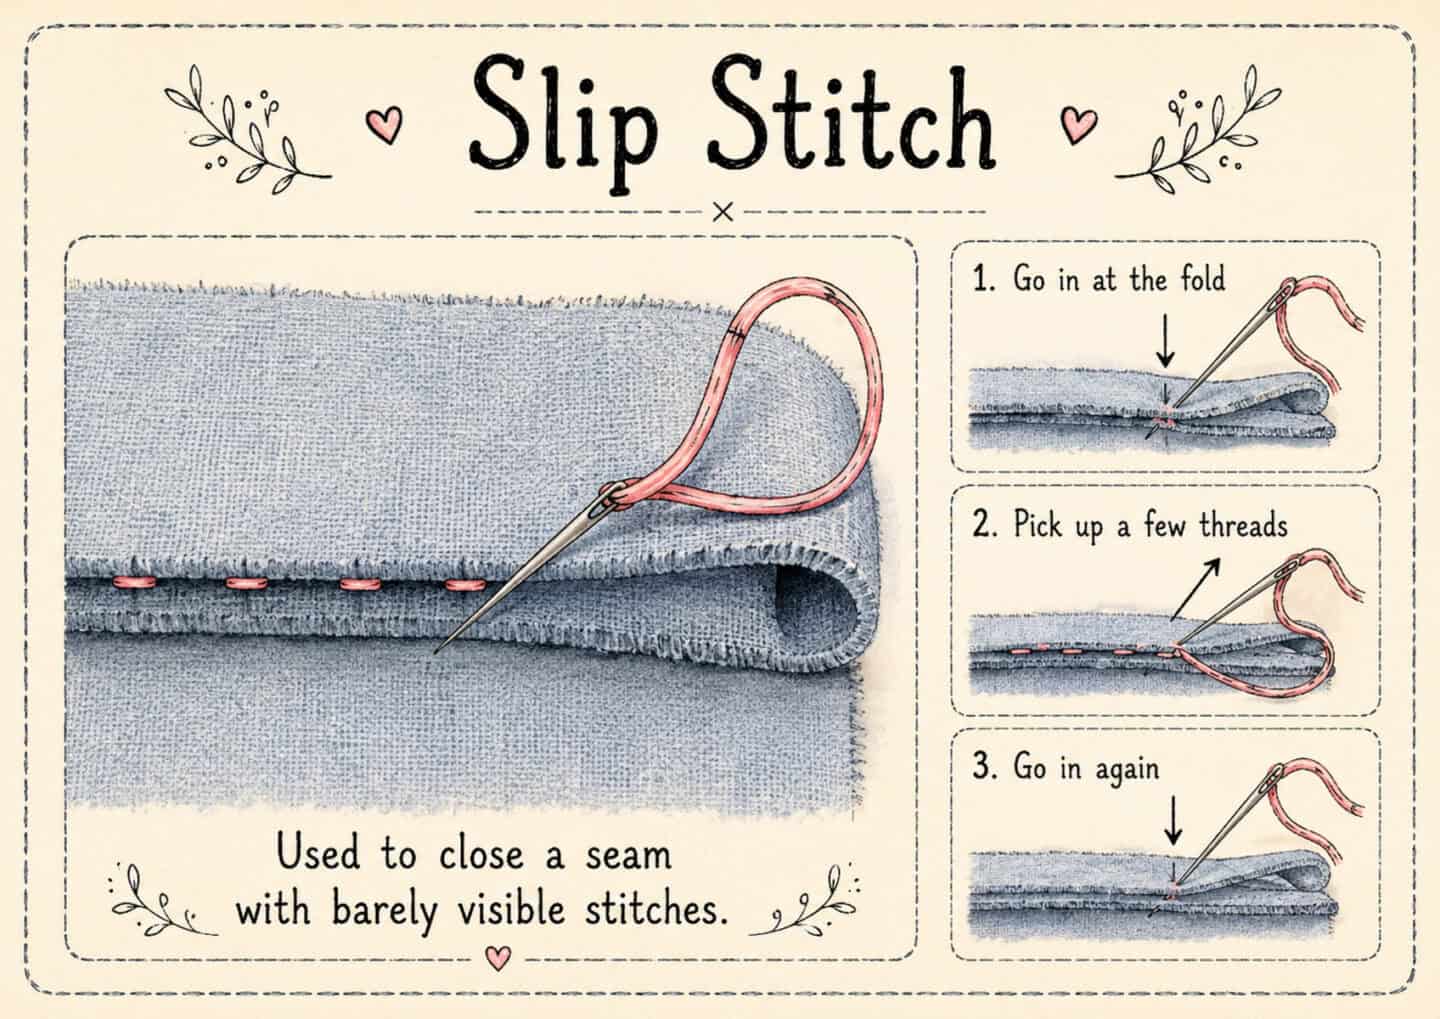
This is the stitch you might use to close a stuffed ornament, finish the opening on a small pillow, hand stitch a lining, or sew down a folded edge.
To make a slip stitch, fold the raw edges of the fabric to the inside and press them if needed. Bring your needle up from inside the fold so the knot is hidden. Take a tiny stitch from one folded edge, then take a tiny stitch directly across from it on the other folded edge. Continue moving back and forth, catching just a small bit of fabric each time.
When you gently pull the thread, the stitches should almost disappear into the fold.
Use the slip stitch for:
- Closing stuffed projects
- Sewing linings closed
- Finishing hems by hand
- Closing pillow or ornament openings
- Joining folded fabric edges invisibly
The trick with slip stitch is to take small bites of fabric and not pull too tightly. If you pull too hard, the edge can pucker. Gentle is the word here. We are stitching, not wrestling.
Tack Stitch
A tack stitch is a small stitch used to hold something in place. It is not usually meant to be the main seam. Instead, it’s the tiny helper stitch that keeps a fold, trim, ribbon, lining, or small detail from shifting.
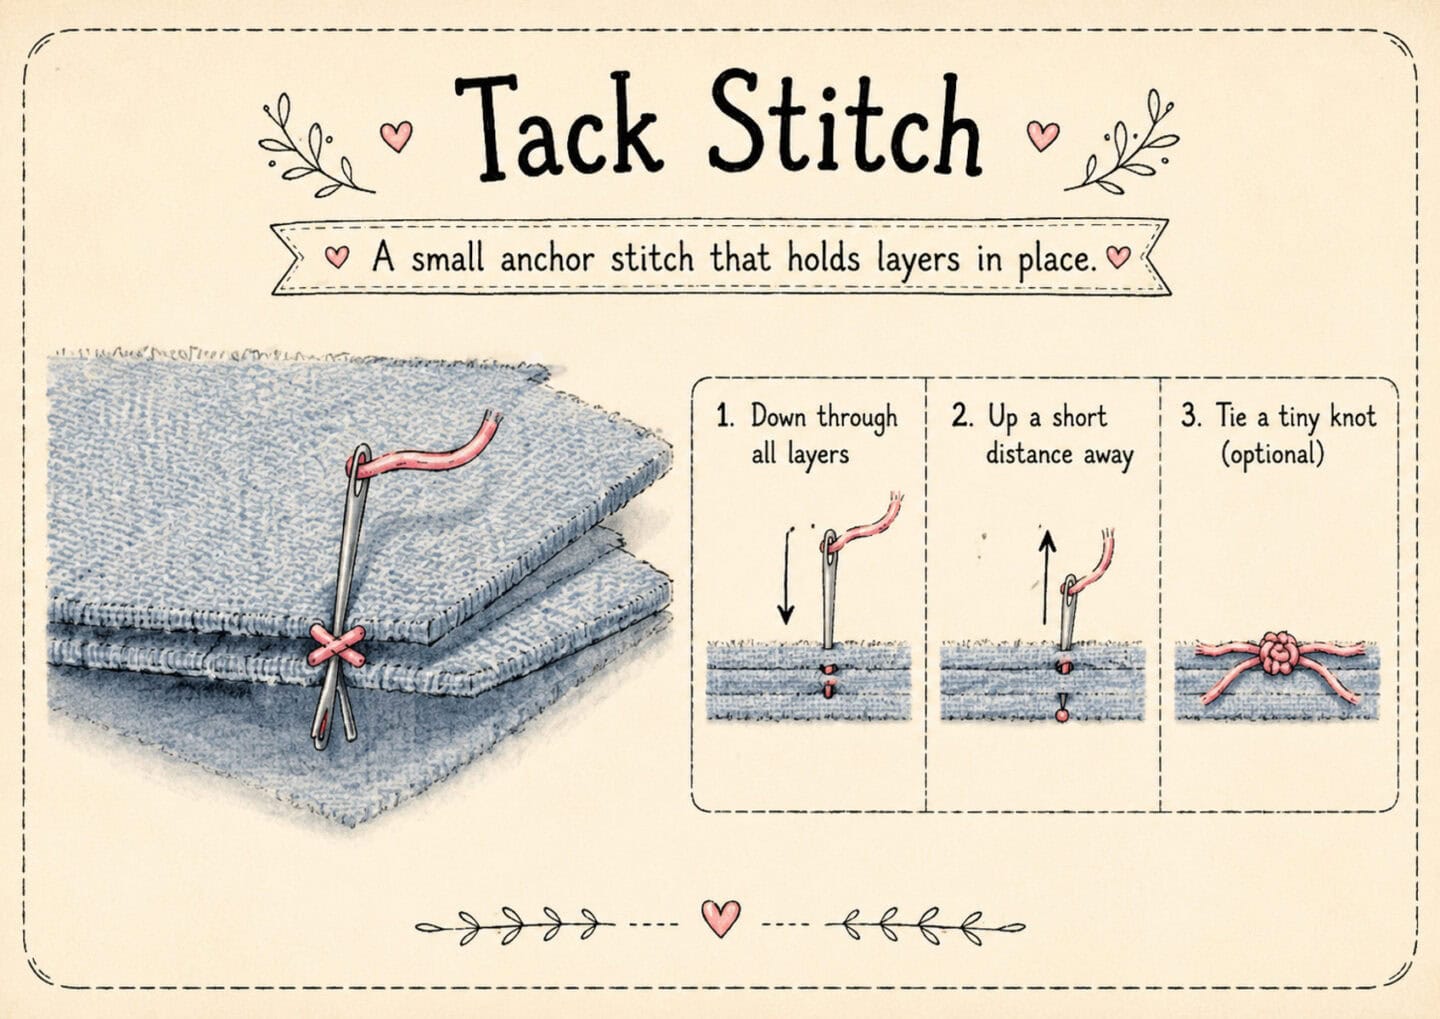
Think of tack stitches as little anchors. They are small, simple, and very useful.
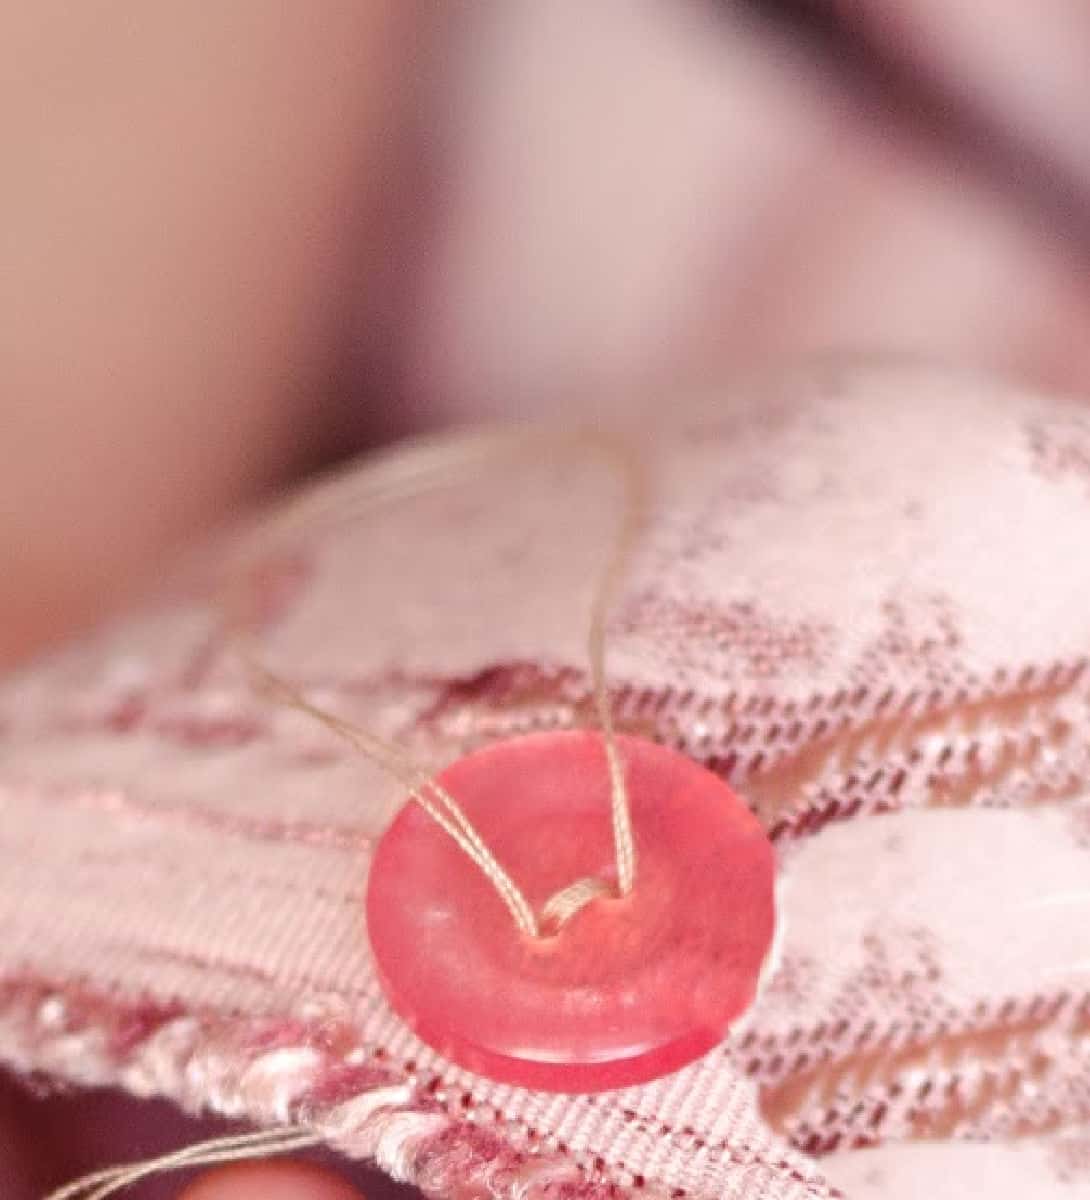
To make a tack stitch, bring your needle up through the fabric and take a small stitch through the layers you want to hold together. You can repeat the stitch in the same spot a few times for strength, then knot off securely.
Tack stitches can be almost invisible if you use matching thread and keep them tiny. They can also be decorative if you use contrasting thread and make them part of the design.
Use tack stitches for:
- Holding down a folded edge
- Securing ribbon or trim
- Anchoring a lining
- Keeping small appliqué pieces from shifting
- Holding fabric layers before final stitching
- Adding tiny decorative details
A tack stitch is especially handy for small projects, where one little stitch can solve a whole problem. Sometimes the best sewing trick is just convincing the fabric to behave.
Appliqué Stitch
An appliqué stitch is used to sew one piece of fabric onto another. This is the stitch you’ll use when adding a fabric shape, patch, small design, or decorative layer to a background fabric.
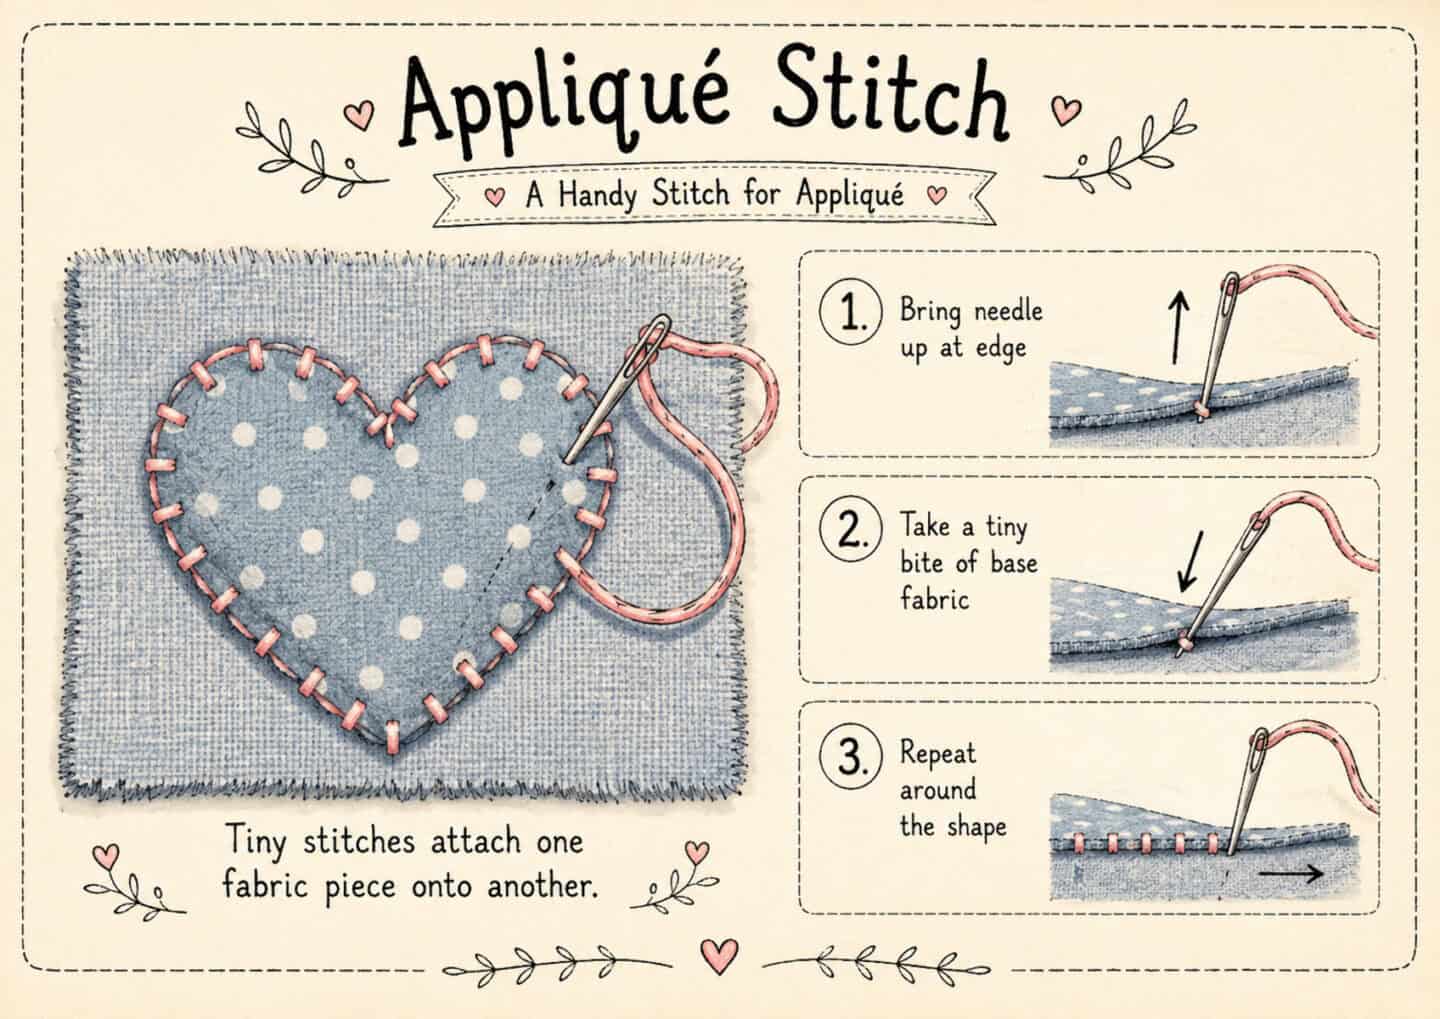
There are several ways to sew appliqué by hand, but for simple projects, a small neat stitch around the edge works beautifully. You can make the stitches nearly invisible with matching thread, or use contrasting thread and let the stitching become part of the design.
To make a basic appliqué stitch, place your appliqué piece on the background fabric and hold it in place with pins, clips, or a small amount of washable glue if you like. Bring your needle up close to the edge of the appliqué shape. Take a tiny stitch into the appliqué edge, then bring the needle back down into the background fabric right beside it.
Continue around the shape, keeping your stitches small and close to the edge.
Use an appliqué stitch for:
- Attaching fabric shapes
- Sewing patches
- Decorative fabric designs
- Wool appliqué
- Felt details
- Small handmade embellishments
For turned-edge appliqué, the raw edge is folded under as you stitch. For felt or wool appliqué, the edge is often left raw because those fabrics do not fray much. That makes felt and wool especially friendly for beginners.
Which Stitch Should You Use?
If you are not sure which stitch to choose, think about what you need the stitch to do.
Use a running stitch when you want something quick, simple, or decorative.
Use a backstitch when you need strength.
Use a blanket stitch when you want to finish an edge or sew felt pieces together.
Use a slip stitch when you want the stitches to disappear.
Use a tack stitch when you need to hold something in place.
Use an appliqué stitch when you are sewing one fabric shape onto another.
You don’t need to master them all in one afternoon. Start with the running stitch and backstitch, then add the others as your projects call for them.
A Few Hand Sewing Tips
- Keep your thread shorter than you think you need. It will tangle less.
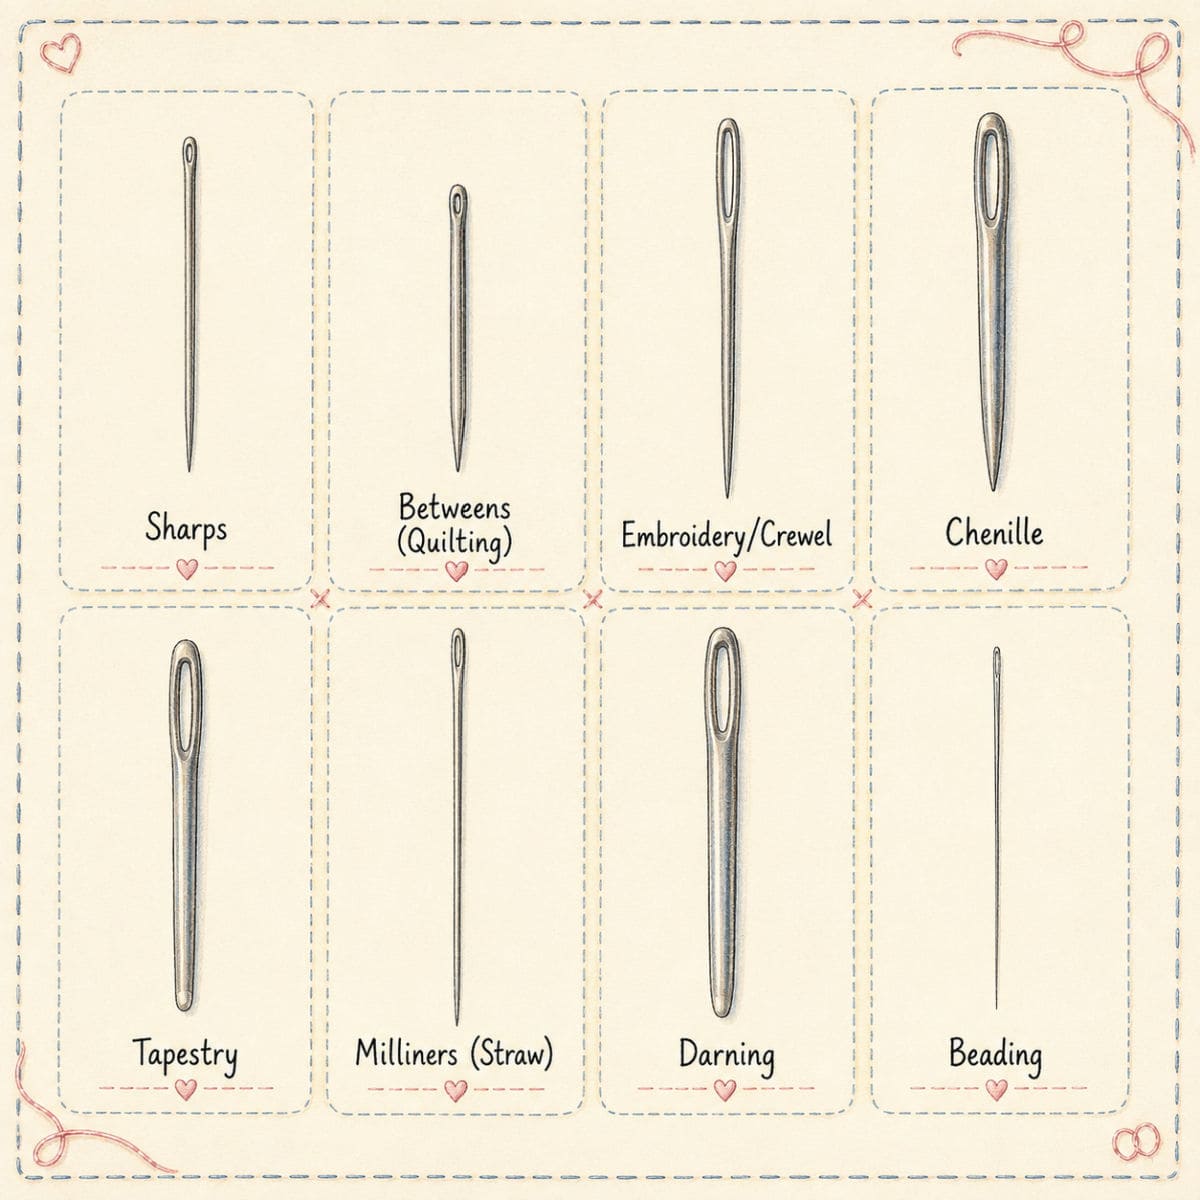
- Use a needle that feels comfortable in your hand and works with your fabric.
- Match your thread when you want the stitches to hide.
- Use contrasting thread when you want your stitches to show.
- Take your time around curves and corners.
- Don’t worry if your stitches are not perfectly even at first.
Hand sewing is meant to be a little slower. That is part of what makes it enjoyable. You can sit down with a small project, a cup of tea, a good light, and stitch your way through something useful or pretty without dragging out a machine.
A few basic hand sewing stitches are all you need to start making small fabric projects with confidence. And once you get comfortable, you may find that the stitching itself is the best part.