If you’ve never sewn in a zipper by hand before, this technique , sometimes called a “hand-picked zipper” is one of the most forgiving ways to learn. There’s no fighting a machine foot around a zipper pull, and every stitch is fully under your control. It takes a little patience, but the payoff is a beautifully clean, professional-looking finish.
This method works for centered zippers in pillow covers, pouches, skirts, and dresses anywhere you’d normally use a lapped or centered zipper application.
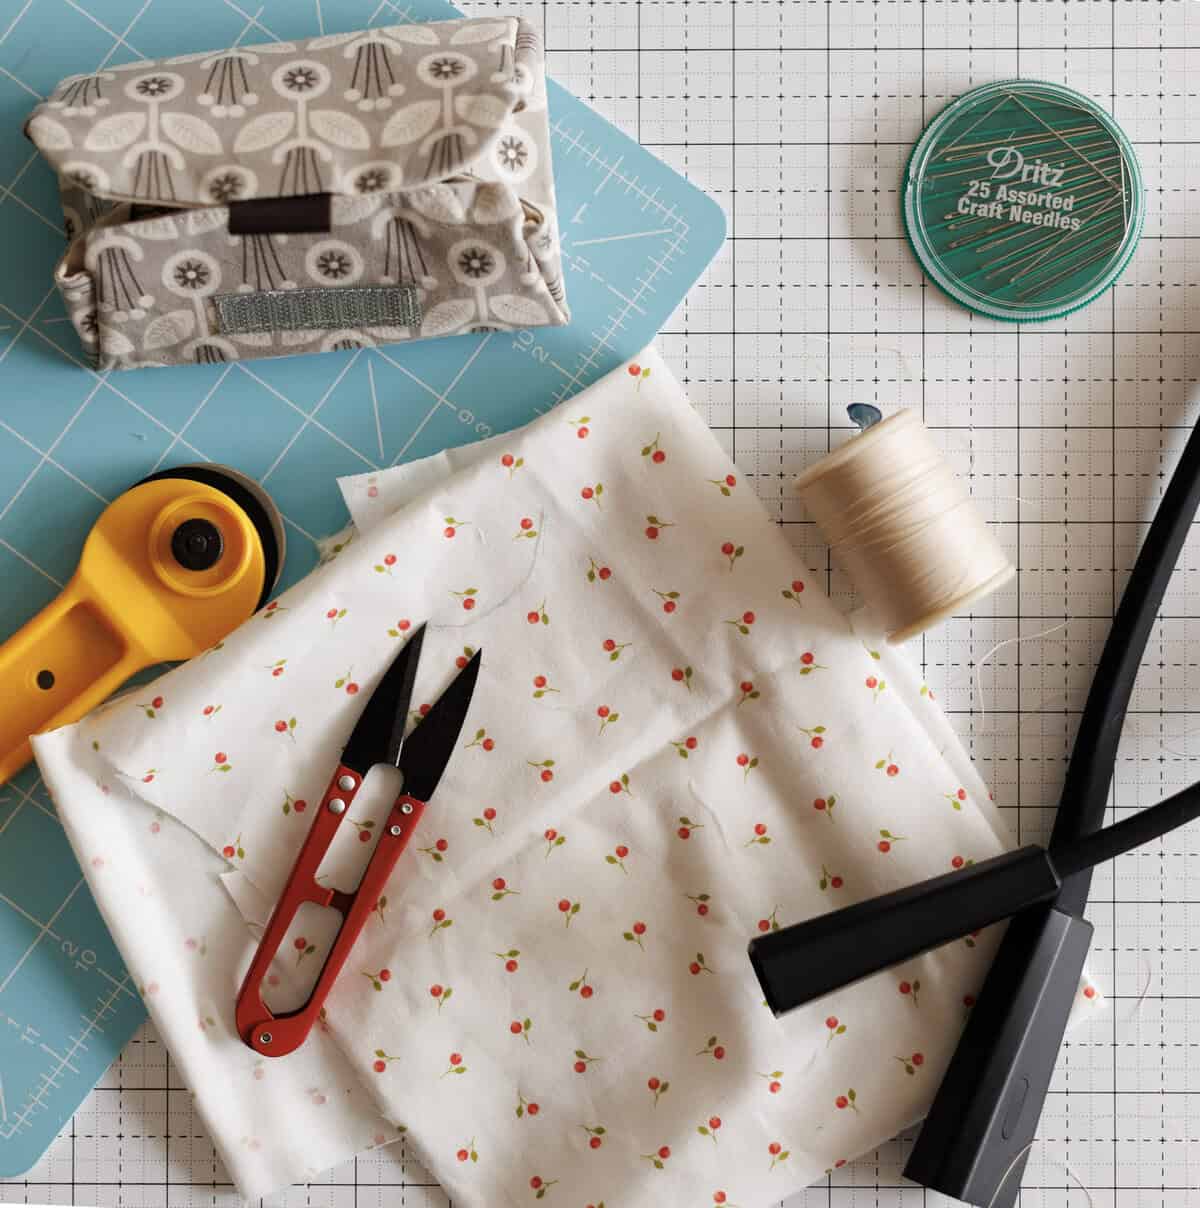
Before we dive in, let’s make sure you’re set up right, if you haven’t already, take a peek at your basic hand sewing kit so you’ve got everything on hand before you thread that needle.
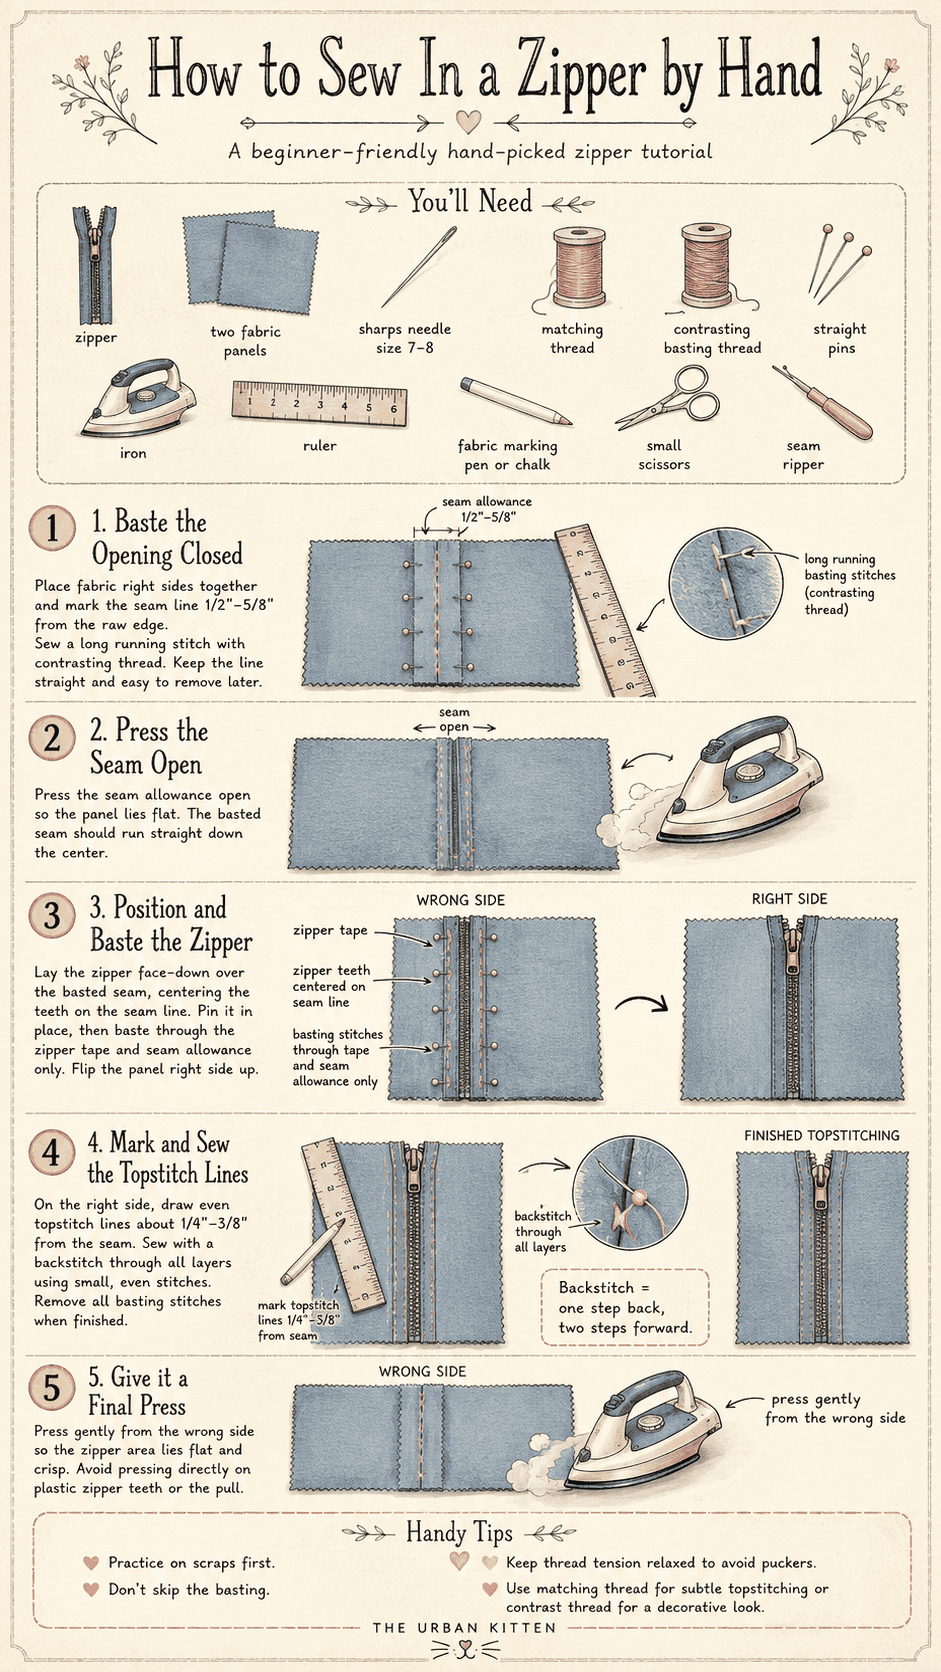
What You’ll Need
- A zipper (make sure it’s the length called for in your pattern, or 1-2″ longer than your opening if you’re improvising you can always shorten a zipper, but you can’t lengthen one)
- The two fabric panels you’re joining, with the zipper opening already marked or seamed
- Needle (a sharps needle in size 7-8 works well for most quilting cottons and linens)
- Thread to match your fabric (regular sewing thread for basting, and either matching thread or topstitching thread for your final visible stitches)
- Contrasting thread for basting (so it’s easy to spot and remove later)
- Straight pins
- An iron and ironing board
- A ruler
- A fabric marking pen or chalk (something that will wash out or fade)
- Small, sharp sewing scissors
- A seam ripper (just in case)
Step 1: Baste the Zipper Opening Closed
With right sides together (the two “right” or printed/finished sides of your fabric facing each other), pin your fabric along the edge where the zipper will go.
Using your ruler and fabric pen, mark your seam line — this is usually 1/2″ to 5/8″ from the raw edge, but check your pattern for the exact measurement.
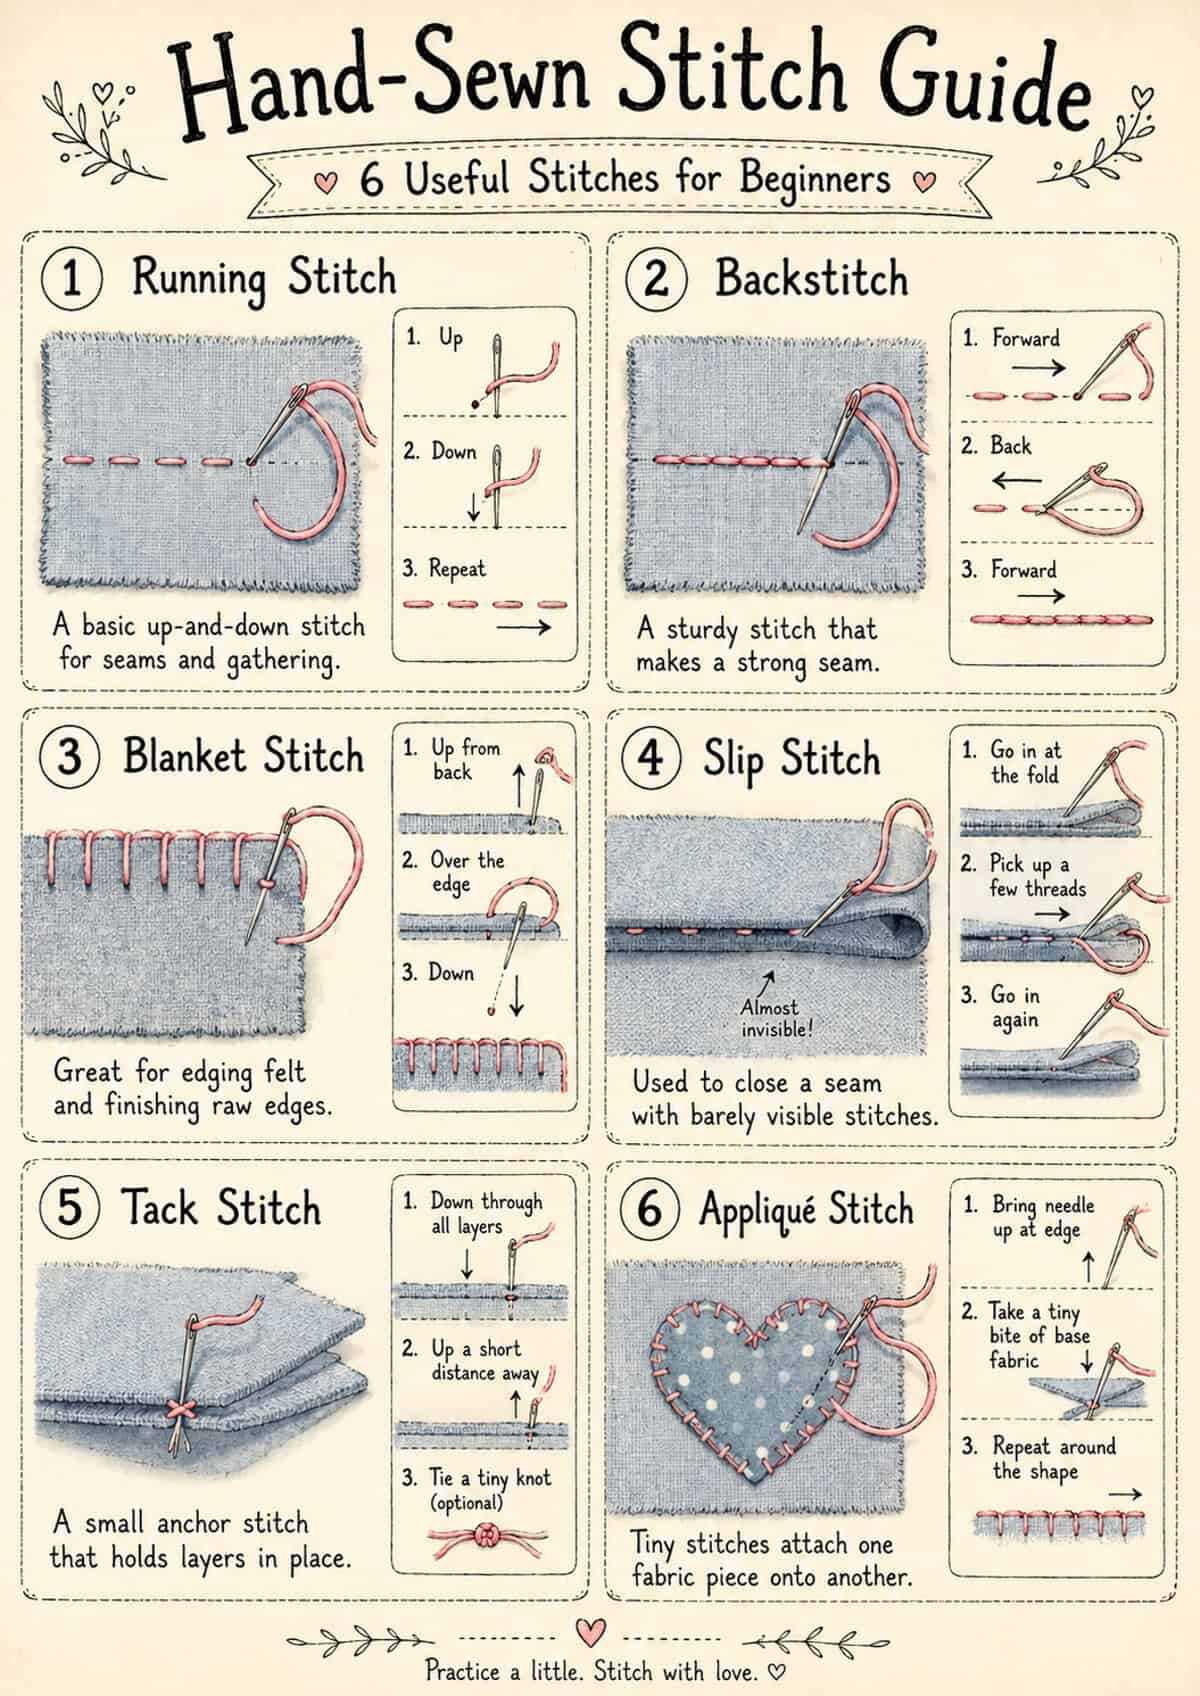
Using a needle and thread, baste along this marked line with a simple running stitch. Basting stitches are meant to be removed later, so:
- Use long stitches (about 1/2″ long) — this makes them faster to sew and much easier to pull out afterward
- Use a contrasting thread color so you can find every stitch later
- Focus on keeping your line straight rather than making your stitches tiny — accuracy matters more than neatness here
This basted seam is a placeholder. It holds your fabric together in the exact position it needs to be so you can attach the zipper accurately, and you’ll remove it once the zipper is permanently in place.
Step 2: Press the Seam Open
Take your basted panel to the ironing board and press the seam allowance open, so it lies flat with the seam line running down the center and the two raw edges pressed away from each other on either side.
You should now have a single flat panel of fabric, with your basting stitches visible as a straight line down the middle, and the seam allowance fabric on either side of that line facing you.
Step 3: Position and Baste the Zipper
Lay your zipper face-down on top of the seam allowance, centering the zipper teeth directly over your basted seam line. The zipper pull should be oriented the way it will sit in the finished project (check your pattern if you’re not sure which end goes where).
Pin the zipper in place, then baste through the zipper tape and the seam allowance only not through to the front of your fabric — along both sides of the zipper. This is what holds the zipper securely in position so it doesn’t shift while you’re doing your final stitching.
Once both sides are basted, flip the whole panel over so the right side of your fabric (the “public” side people will see) is now facing up, with the zipper sandwiched behind it.
Step 4: Mark and Sew the Topstitch Lines
This is the step that will show on the finished piece, so take your time here.
Using your ruler and fabric pen, draw your topstitch lines on the right side of the fabric, on both sides of the (now-hidden) basted seam. A common spacing is about 1/4″ to 3/8″ out from the seam line on each side, but you can adjust this based on how wide you’d like your visible topstitching to be — just make sure both sides are even.
Before you commit to your final stitches, it’s worth double-checking that your zipper pull actually glides smoothly the full length of the zipper and that the teeth are running straight underneath — much easier to fix now than after your topstitching is in.
Using a backstitch, sew along your marked lines through all layers (front fabric, seam allowance, and zipper tape). A backstitch is worked by:
- Bringing your needle up through the fabric
- Inserting it back down a stitch-length behind where your thread came up
- Bringing it up again a stitch-length ahead of your starting point
- Repeating this “one step back, two steps forward” motion down the line
This creates a solid, continuous line on the front that looks like machine stitching. Use small, even stitches here (about 1/8″ or smaller) since this stitching is permanent and visible — this is the opposite of your basting stitches in Step 1.
Once both topstitch lines are sewn and secured, go back and remove all of your basting stitches — this is why the contrasting thread color helps so much, since you’ll be able to spot every one.
Step 5: Give it a Final Press
Turn your work over and give the zipper area a gentle press from the wrong side (avoid pressing directly on the zipper teeth or pull if it’s plastic or nylon, as heat can warp them). This helps everything sit flat and crisp.
Voilà! you’ve hand-sewn a zipper!
Tips
- Practice on scraps first. If this is your first time, cut two small scraps of fabric and a spare zipper (or an old one) and run through all five steps once before working on your actual project. It only takes a few minutes and builds a lot of confidence.
- Don’t rush the basting. It feels like an extra step, but it’s what makes your final topstitching so much easier and more accurate. Skipping it usually means fighting with a shifting zipper later.
- Keep your stitch tension relaxed. Pulling your thread too tight, especially during topstitching, can cause the fabric to pucker along the zipper.
- Match your thread to your fabric for the topstitching if you want the zipper to blend in, or use a contrasting or topstitching thread if you’d like it to be a visible design detail.
- Beeswax your thread if you find it’s tangling or knotting — running your thread through a small block of beeswax before sewing helps it glide through the fabric more smoothly.